1. Understanding Museum-Style Lighting
Creating a museum-quality lighting setup at home starts with understanding how light interacts with artwork. Museums use specialized lighting techniques to enhance the visual impact of art while preserving its condition. By applying these principles, you can showcase your home art collection beautifully and safely.
How Light Affects Artwork
Light plays a crucial role in how we perceive colors, textures, and details in artwork. However, excessive exposure to certain types of light can cause fading, discoloration, and material degradation over time. The key is to balance brightness and protection by selecting the right lighting type and intensity.
Types of Lighting Used in Museums
Museums typically use a combination of different lighting types to achieve optimal results. Understanding these options will help you make informed choices when illuminating your own collection.
| Lighting Type | Description | Best Use |
|---|---|---|
| Ambient Lighting | General lighting that provides overall illumination for a space. | Used as background lighting to create an inviting atmosphere. |
| Accent Lighting | Focused lighting designed to highlight specific artworks. | Ideal for drawing attention to individual pieces without overpowering them. |
| Task Lighting | Lighting intended for specific activities such as reading or working. | Mainly used in workspaces but can be useful near detailed artwork. |
| Wall Washers | Broad, even lighting that illuminates entire walls. | Smoothly highlights multiple pieces along a gallery wall. |
| Spotlights | Narrow beams of light directed at particular areas or objects. | A great choice for emphasizing focal points within an art display. |
Selecting the Right Light Source
The type of bulb you choose significantly impacts the way your artwork appears. Museums often use LED lights because they produce minimal heat and UV radiation, reducing the risk of damage. Here are some common options:
- Tungsten Halogen: Provides warm, natural-looking light but generates heat and requires UV filtering.
- LED Lights: Energy-efficient with adjustable color temperatures; ideal for museum-style displays.
- Fluorescent Lights: Not recommended due to their high UV output, which can degrade artwork over time.
The Importance of Light Placement
Avoid placing lights too close to artworks, as heat buildup can lead to deterioration. Ideally, position fixtures at a 30-degree angle to minimize glare and shadows while enhancing visibility. Adjustable track lighting or recessed fixtures work well for this purpose.
This foundation in museum-style lighting will help you make better decisions when setting up the perfect display for your home art collection. In the next section, well explore specific techniques for positioning and adjusting lights to create the best possible presentation.
2. Choosing the Right Light Sources
Proper lighting enhances the beauty of your artwork while preserving its integrity. Choosing the right light sources involves considering factors like color temperature, Color Rendering Index (CRI), and energy efficiency. Below, we break down these key elements to help you make the best choice for your home art collection.
Understanding Color Temperature
Color temperature is measured in Kelvin (K) and affects how warm or cool the light appears. The right temperature can bring out the best in your artwork without distorting colors.
| Color Temperature (K) | Appearance | Best Use |
|---|---|---|
| 2700K – 3000K | Warm white | Best for traditional paintings and warm-toned artworks |
| 3500K – 4000K | Neutral white | Works well for most types of art, providing balanced illumination |
| 5000K – 6500K | Cool white / Daylight | Ideal for contemporary pieces and high-contrast artworks |
The Importance of CRI (Color Rendering Index)
CRI measures how accurately a light source displays colors compared to natural sunlight. A higher CRI ensures that artwork looks as intended by the artist.
- 80-89 CRI: Good color rendering, suitable for general lighting but may not show all details accurately.
- 90+ CRI: Excellent color accuracy, recommended for illuminating artwork with precision.
- 95+ CRI: Museum-quality lighting that preserves true colors and details.
Energy-Efficient Lighting Options
Selecting energy-efficient lighting reduces heat output, protects artwork from damage, and lowers electricity costs. Here are some top choices:
LED Lights
Pros:
- Long lifespan (up to 50,000 hours)
- Low heat emission, reducing risk of artwork deterioration
- Available in high CRI options for accurate color representation
- Dimmable options for adjustable brightness
Cons:
- Higher initial cost compared to other bulbs, but long-term savings offset this expense.
- Quality varies by brand—choose reputable manufacturers.
Halogen Lights
Pros:
- Crisp, bright light with good color accuracy
- Dimmable for better control over brightness levels
Cons:
- Produces more heat than LEDs, which can damage delicate artwork over time.
- Shorter lifespan compared to LED bulbs.
- Less energy-efficient than LED options.
Avoiding UV and Infrared Damage
Avoid incandescent bulbs and fluorescent lights as they emit UV rays and infrared radiation, which can fade colors and degrade materials over time. Always opt for UV-filtered or LED lighting to preserve your artwork’s longevity.
Selecting Fixtures for Art Lighting
The type of fixture you choose plays a crucial role in directing light effectively onto your artwork. Here are some recommended options:
- Track Lighting: Adjustable heads allow flexibility in highlighting different pieces.
- Picture Lights: Mounted directly above artwork for focused illumination.
- Recessed Lighting: Provides a clean look with adjustable beam angles.
- Sconces: Can add ambiance while accentuating framed pieces on walls.
- Cove Lighting: Indirect lighting that softly enhances the room’s atmosphere without harsh shadows.
Selecting the right combination of bulbs and fixtures will ensure that your home art collection is beautifully illuminated while maintaining its original vibrancy and detail.
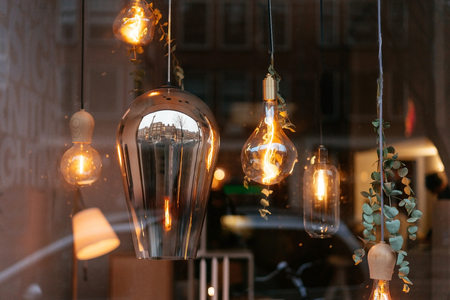
![]()
3. Positioning and Angling Lights for Maximum Impact
Proper positioning and angling of lights play a crucial role in achieving museum-style lighting for your home art collection. The right approach minimizes glare, reduces shadows, and enhances textures and details, allowing each piece to be appreciated as intended.
Finding the Best Light Placement
The placement of lights should depend on the type of artwork and its location within your space. A common rule used in museums is the 30-degree rule, which helps reduce glare and unwanted reflections.
| Light Angle | Effect on Artwork |
|---|---|
| Less than 30° | Can create excessive glare and reflection on glass-covered artworks. |
| Around 30° | Minimizes glare while providing even illumination across the artwork. |
| More than 30° | Might cause long shadows that alter the perception of texture. |
Avoiding Shadows and Uneven Lighting
If a single light source casts harsh shadows, consider using multiple light sources positioned at different angles. This is especially important for textured or three-dimensional pieces like sculptures or relief paintings. Track lighting with adjustable heads allows you to control directionality for an even spread of light.
The Role of Distance in Lighting
The distance between the light source and the artwork affects brightness and coverage. Closer lights create more focused beams, whereas further distances result in softer illumination. Dimmable fixtures help fine-tune brightness without moving the lights physically.
Tilt Adjustment for Framed Artworks
If your artwork is framed with glass, slight downward tilting of light fixtures prevents direct reflections while maintaining proper illumination. This technique ensures that viewers can enjoy the artwork without distracting glare.
4. Using Layers of Light for a Dynamic Presentation
Creating a museum-quality display for your home art collection requires more than just a single light source. Professional galleries and museums use layered lighting techniques to add depth, highlight textures, and create an immersive viewing experience. By combining ambient, accent, and task lighting, you can achieve a dynamic presentation that enhances the visual impact of your artwork.
Understanding the Three Layers of Lighting
To properly illuminate your art collection, it’s essential to incorporate three main types of lighting: ambient, accent, and task lighting. Each serves a unique purpose and contributes to the overall aesthetic.
| Lighting Type | Description | Best Use for Artwork |
|---|---|---|
| Ambient Lighting | The general lighting in a room, usually from ceiling fixtures or natural light. | Provides overall illumination without overpowering the art. |
| Accent Lighting | Focused light sources such as track lights or picture lights that highlight specific artworks. | Creates emphasis on individual pieces and enhances depth. |
| Task Lighting | Lights used for specific activities like reading or working but can also be directed toward art displays. | Useful for illuminating artwork in multi-purpose spaces. |
How to Layer Light Effectively
1. Establish a Base with Ambient Lighting
Your ambient lighting sets the tone for the space. Soft, diffused lighting helps maintain balance and prevents harsh shadows. Consider using dimmable overhead fixtures so you can control brightness levels based on the time of day.
2. Highlight Art with Accent Lighting
Accent lighting is crucial for drawing attention to specific pieces in your collection. Adjustable track lights, recessed spotlights, or wall-mounted picture lights work well for directing focus onto your artwork. Position these lights at a 30-degree angle to minimize glare and shadows.
3. Enhance Detail with Task Lighting
If your artwork is displayed in areas where you read or work, consider using adjustable lamps or sconces to provide additional illumination without overwhelming the piece. Task lighting should complement rather than compete with accent lighting.
Balancing Light Intensity and Color Temperature
The key to effective museum-style lighting is balancing brightness and color temperature. Ideally, use LED bulbs with a color temperature between 2700K and 3000K to mimic natural light while protecting your artwork from UV damage.
Final Tips for Layering Light Successfully
- Use dimmers to adjust light intensity based on time of day and mood.
- Avoid placing direct light sources too close to paintings to prevent heat damage.
- Experiment with different angles and distances to find the best presentation for each piece.
- If possible, consult with a lighting designer to fine-tune your setup for optimal results.
By thoughtfully layering ambient, accent, and task lighting, you can transform your home into a gallery-like space that beautifully showcases your art collection while maintaining a warm and inviting atmosphere.
5. Protecting Your Artwork from Light Damage
Proper lighting enhances the beauty of your home art collection, but without precautions, light exposure can cause fading and deterioration over time. Museums use specific techniques to protect valuable artwork, and you can apply these same methods in your home.
Use UV-Filtered Lighting
Ultraviolet (UV) rays are one of the main culprits behind artwork fading. Using UV-filtered lighting can significantly reduce damage. Here are some effective options:
| Lighting Type | UV Protection Level | Best for Home Use? |
|---|---|---|
| LED Lights | Excellent (No UV Emission) | Yes, highly recommended |
| Tungsten Halogen with UV Filters | Good (With Proper Filters) | Yes, if used with filters |
| Fluorescent Lights | Poor (High UV Emission) | No, not recommended |
Avoid Direct Sunlight Exposure
Naturally lit rooms create a bright and inviting space, but direct sunlight can cause significant damage to artwork. To minimize exposure:
- Position Artwork Wisely: Avoid placing art directly across from windows where sunlight hits throughout the day.
- Use Window Treatments: Install UV-filtering window films, blinds, or curtains to block harmful rays.
- Create Controlled Lighting Conditions: Use artificial lighting that mimics natural daylight without emitting harmful UV rays.
Control Heat and Humidity Levels
Apart from light exposure, heat and humidity fluctuations can accelerate deterioration. Follow these tips to maintain ideal conditions:
- Avoid High-Heat Light Sources: Incandescent and halogen bulbs generate heat that may warp or dry out artwork.
- Maintain Stable Temperature: Keep your home between 65-75°F (18-24°C).
- Add a Dehumidifier if Needed: Ideal humidity levels should stay around 40-50%.
Museum-Style Lighting for Long-Term Preservation
Museums carefully design lighting systems to balance visibility with preservation. By using LED lights, avoiding direct sunlight, and maintaining stable environmental conditions, you can enjoy your art collection for years without worrying about damage.