Understanding Layered Lighting
If you want your home to feel cozy, functional, and downright Instagram-worthy, nailing your lighting plan is the first step. In the world of interior design, “layered lighting” isnt just a fancy buzzword—its the real secret sauce that makes your space shine (literally and figuratively). To create a balanced layered lighting plan, you’ll need to mix three main types of light: ambient, task, and accent. Understanding these basics sets the stage for a well-lit, inviting home that’s ready for everything from Netflix marathons to dinner parties.
Choosing the Right Fixtures
When it comes to crafting a layered lighting plan that feels both inviting and functional, choosing the right fixtures is key. In American homes, lighting isn’t just about brightening up a room—it’s about expressing your personality and complementing your décor. Let’s break down some of the most popular fixture types you’ll see stateside, and how to pick what works best for your space.
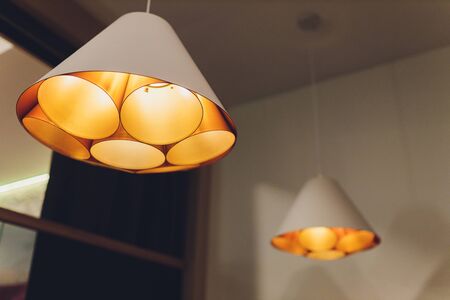
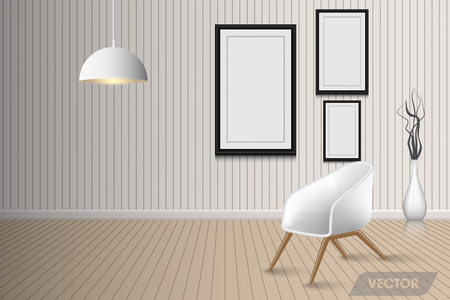
Sconces, Pendants, and Recessed Lights: The Classic Trio
Each type of fixture brings its own vibe and utility to the table. Check out this quick guide to help you decide:
| Fixture Type | Best For | Style Notes |
|---|---|---|
| Sconces | Hallways, bathrooms, accent walls | Add vintage charm or modern flair; great for layered, ambient lighting |
| Pendants | Kitchens, dining areas, entryways | Statement pieces—think mid-century globes or industrial Edison bulbs |
| Recessed Lights | Living rooms, bedrooms, kitchens | Sleek, unobtrusive look; ideal for even general illumination |
Matching Fixtures With Your Home’s Style
Want that classic Americana feel? Go for oil-rubbed bronze sconces or schoolhouse pendants. If you’re into mid-century modern vibes, brass finishes and geometric shapes are having a big moment in U.S. interiors. Prefer something minimalist? Matte black or white recessed cans blend seamlessly into any ceiling.
Pro Tip: Mix & Match Without Clashing
The secret sauce in American home design is mixing different fixtures while maintaining harmony. Choose a consistent finish or color palette across fixtures—like warm brass or cool chrome—to keep things cohesive without being matchy-matchy. And always consider dimmers; nothing says “custom comfort” like adjustable lighting that fits every mood.
3. Planning Your Lighting Zones
When it comes to creating a truly functional and inviting home, planning your lighting zones is a total game-changer. Each room has its own personality and purpose, so you’ll want to get strategic about how you layer the light. Let’s break down some smart tips for mapping out those zones like a pro.
Think Room by Room
Start with a walk-through of your home. Picture your living room, kitchen, bedroom, and even hallways—each space deserves its own unique lighting setup. For example, you might want cozy, dimmable lighting in the bedroom for winding down, but crisp task lighting in the kitchen where you prep meals.
Define Your Needs
Ask yourself: What do I do in this room? Do you read in the living room? Need a bright vanity area in the bathroom? Jot down every activity that happens in each space. This helps pinpoint where to place ambient, task, or accent lights.
Map It Out
Grab a notepad (or go full retro with graph paper) and sketch out each room. Mark where natural light comes in during the day and where you’ll need extra illumination at night. Don’t forget corners or alcoves that could use a little love from a floor lamp or sconce!
Blend Comfort with Practicality
The trick to balanced lighting is combining practicality with comfort. Layering different types of light—overhead fixtures for overall glow, table lamps for warmth, under-cabinet lights for tasks—means you can adjust the mood with just a flip of a switch.
Stay Flexible
Your lifestyle might change over time, so keep things adaptable. Plug-in fixtures and smart bulbs let you tweak your setup without calling in an electrician every time you want to switch things up. The goal: every lighting zone should make life easier and feel just right, morning or night.
4. DIY Installation Tips and Safety
Rolling up your sleeves and installing lighting on your own can be a rewarding project, but safety always comes first—no exceptions. Here’s how to light up your home like a pro, keep things code-compliant, and tap into some classic American DIY ingenuity.
Essential Safety Guidelines
| Task | Safety Tip |
|---|---|
| Turning Off Power | Always shut off the circuit breaker before starting any electrical work. Double-check with a voltage tester. |
| Using Proper Tools | Stick with insulated screwdrivers, wire strippers, and wear rubber-soled shoes for extra protection. |
| Working With Ladders | Set up ladders on level ground and never overreach. Have a buddy spot you if possible. |
| Reading Labels & Instructions | Review all manufacturer instructions and look for UL or ETL certifications to ensure fixtures are safe for home use in the U.S. |
| Code Compliance | Check your local building codes or consult with a licensed electrician if you’re unsure about wiring or placement requirements. |
Clever DIY Hacks for Lighting Installation
- Pilot Holes for Precision: Use a small drill bit to make pilot holes before installing heavy fixtures—this helps prevent splitting wood or damaging drywall.
- No-Fuss Wire Connectors: Opt for push-in wire connectors (like Wago) instead of old-school wire nuts for faster, safer connections.
- Tape as an Extra Hand: Painter’s tape can temporarily hold fixtures or wires in place while you secure mounting screws.
- Sizing Up Your Fixtures: Map out fixture locations with painter’s tape on the ceiling or wall to visualize spacing before drilling any holes.
- Dimmers & Smart Controls: Upgrade switches to dimmers or smart controls for flexible ambiance—just make sure they’re compatible with your bulb types.
Quick Reference: Must-Have Tools for DIY Lighting Jobs
| Tool Name | Why You Need It |
|---|---|
| Voltage Tester | Confirms power is off before you touch wires. |
| Wire Strippers/Cutters | Makes clean cuts and strips insulation safely. |
| Circuit Finder | Easily identifies which breaker controls each room—a real time-saver! |
| Screwdriver Set (Insulated) | Keeps hands safe from accidental shocks while tightening terminals or mounting plates. |
| Ladder (6ft or 8ft) | The right height makes ceiling installs safe and easy—skip the wobbly chair, friend. |
A Few Final Pro Tips
If you ever feel out of your depth—especially with complex wiring—don’t hesitate to call in a licensed electrician. And when in doubt, reference the National Electrical Code (NEC) or your city’s permit office for regulations specific to your area. With careful planning, safety-first practices, and a dash of can-do spirit, you’ll have your home glowing beautifully—and safely—in no time flat!
5. Smart Controls and Customization
Ready to dial up your home’s vibe with a flick or a tap? American homes are embracing smart lighting controls that go way beyond the classic wall switch. Smart switches, dimmers, and connected lighting systems let you orchestrate every layer of light, from cozy evenings to high-energy mornings, all tailored to your personal style.
Make It Yours with Smart Switches
Forget running around flipping switches—installing Wi-Fi-enabled or Zigbee smart switches gives you the power to control multiple light sources from your phone or by voice. Popular brands like Lutron Caséta, Leviton Decora, and GE Cync offer options that blend right into American décor while letting you set the scene for movie night or morning coffee with just one command.
Dimmers: The Mood-Setting Must-Have
Dimmers aren’t just for dining rooms anymore. Modern smart dimmers fit in any room and work with LEDs, allowing you to adjust brightness for tasks, relaxation, or entertaining guests. Set schedules to mimic sunrise or sunset—perfect for busy weekday mornings or lazy Sunday brunches.
Layered Lighting, One Tap Away
Sync your overheads, sconces, and accent lights using apps like Google Home or Apple HomeKit. Want your living room warm and inviting at dusk but cool and focused during work hours? With smart zones and routines, it’s easy. Experiment until you find the perfect combo—after all, the ultimate American DIY spirit is about making things work for your unique lifestyle.
With these tech-savvy upgrades, balanced layered lighting isn’t just functional—it becomes an extension of your personality. So go ahead: mix vintage Edison bulbs with sleek LED strips, program a “Welcome Home” scene, and let your home shine exactly how you want it.
6. Final Touches and Styling
Now that you’ve mapped out your layered lighting plan, it’s time to add those final touches that make your space feel both curated and comfortably livable. Blending old-school charm with modern flair is the secret sauce to a timeless look—think of it as styling your favorite vintage leather jacket with a fresh pair of kicks. Start by selecting statement fixtures that nod to classic design: a brass floor lamp, an art deco sconce, or even a mid-century chandelier can bring character and nostalgia into the mix. Don’t be afraid to pair these with more contemporary elements—sleek LED strips under cabinets or minimalist pendant lights over your kitchen island keep things current without feeling cold.
Mixing Materials and Finishes
The magic happens in the details. Layering isn’t just about light—it’s about texture, too. Try mixing metals like brushed nickel with aged bronze, or glass shades with rattan and fabric diffusers. This approach gives your room depth and keeps it from looking like a showroom. For an extra pop, swap out standard light bulbs for Edison-style filaments or color-tunable LEDs that let you shift the mood from vintage warmth to modern cool at the flick of a switch.
Personalize Your Vibe
Add personality with lampshades in bold patterns, retro finds from thrift shops, or even DIY lanterns made from upcycled jars. Layered lighting isn’t just functional—it’s also about storytelling. Display your favorite art or photos near accent lights to highlight memories, or use dimmers and smart switches to set the mood for everything from cozy movie nights to lively dinner parties.
Keep It Flexible
Remember, trends come and go but flexibility is forever. Use plug-in sconces or portable lamps so you can rearrange your setup as your tastes evolve. The best part of a DIY approach is making it truly yours—so blend eras, break rules, and experiment until you find that perfect balance between classic comfort and modern edge. With these thoughtful finishing touches, your home will glow with a style that’s uniquely American: rooted in tradition but always looking forward.