
Introduction: Why Go Custom?
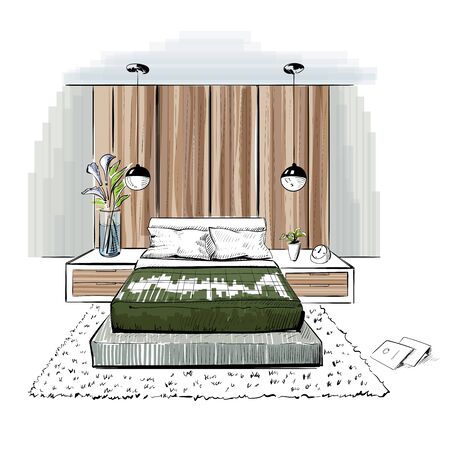
If you’re looking to refresh your bedroom, building a custom headboard is one of the most rewarding projects you can tackle. A DIY headboard lets you infuse your unique personality into your space while creating a statement piece that’s both functional and stylish. Unlike store-bought options, a custom design gives you total control over materials, colors, textures, and size—so your bed truly reflects your taste and lifestyle. Plus, customizing your headboard allows you to maximize comfort, whether that means extra padding for lounging or built-in features like shelves or lighting. Not only does this project add visual interest and character, but it also offers a practical way to enhance relaxation and bring cohesion to your bedroom’s decor. By investing a little creativity and effort, you’ll end up with a headboard that feels as personal as it looks—perfectly tailored for American homes where individuality and comfort are key.
Choosing the Right Materials
When it comes to building a custom headboard that truly reflects your personality and style, selecting the right materials is crucial. In the U.S., some of the most popular and accessible materials for DIY headboards include reclaimed wood, upholstery fabrics, and shiplap. Each material has its own unique benefits, visual appeal, and price point. To help you make the best choice for your needs and budget, consider the following options:
| Material | Pros | Cons | Best For |
|---|---|---|---|
| Reclaimed Wood | Sustainable, rustic charm, unique grain patterns | Can be heavy, may require sanding or sealing | Rustic, farmhouse, or industrial looks |
| Upholstery | Comfortable, endless fabric choices, soft to touch | Requires basic sewing or stapling skills, may stain easily | Modern, cozy, or luxurious designs |
| Shiplap | Crisp lines, easy to paint or stain, lightweight panels | Less texture than natural wood, may look plain if not styled well | Cottage, coastal, or contemporary styles |
How to Select the Best Option for You
Your decision should reflect both your aesthetic preferences and practical needs. If you love sustainable projects and a natural look, reclaimed wood is a solid pick. For those who prioritize comfort and want a splash of color or pattern in their bedroom, upholstered headboards are ideal. Shiplap is perfect if you’re after clean lines and a modern twist with easy customization through paint or stain.
Budget Considerations
Don’t forget to factor in your budget. Reclaimed wood can often be sourced for free from pallets or old furniture but may require more labor. Upholstery costs depend on fabric quality and tools needed (like a staple gun), while shiplap panels are generally affordable at major home improvement stores.
Pro Tip:
If you’re new to DIY projects, start with simple materials like shiplap or pre-cut plywood. As you gain confidence, you can experiment with more complex options like tufted upholstery or intricate woodwork for a truly custom feel.
3. Planning Your Design
Before you start building your custom headboard, its essential to plan every detail to ensure it fits seamlessly with both your bed and your bedrooms unique style. Begin by measuring the width and height of your bed frame—most headboards are designed to be slightly wider than the mattress, so make sure to account for this in your measurements. Dont forget to consider the height; a taller headboard can create a bold statement, while a lower profile offers subtle elegance.
Next, think about your bedroom aesthetics. Are you going for a modern vibe, rustic charm, or something more traditional? Take cues from your bedding, wall colors, and existing furniture. If your space is cozy and neutral, a fabric-upholstered headboard in soft tones might work beautifully. For bolder spaces, consider patterns, textures, or even reclaimed wood for added character.
Once youve nailed down your measurements and design inspiration, sketch out your headboard idea on paper. This doesn’t have to be professional-level art—just a simple outline will do. Note any special features like tufting, trim details, or built-in storage. This step helps you visualize the final look and ensures all elements are proportioned correctly before you move on to gathering materials and building.
4. Building Your Headboard: Step-by-Step Instructions
Gather Your Materials and Tools
Before you get started, make sure you have all your materials and tools at hand. For a typical DIY headboard project in the U.S., here’s what you’ll need:
| Material/Tool | Purpose |
|---|---|
| Plywood or solid wood panel | Main structure of the headboard |
| Foam padding (optional) | Cushioning for comfort |
| Fabric or upholstery material | Covering for style and feel |
| Staple gun & staples | Attaching fabric to wood frame |
| Screws and drill/driver | Assembly and wall mounting |
| Tape measure & pencil | Measuring and marking cut lines |
| Sandpaper or sander | Smoothing rough edges |
| L-brackets (optional) | Extra stability for mounting |
| Level tool | Ensuring straight installation |
| Saw (hand saw or circular saw) | Cutting wood to size |
| Safety gear (gloves, goggles) | Personal protection during work |
Step-by-Step Assembly Process
Step 1: Measure and Cut Your Materials
Using a tape measure, determine the desired height and width of your headboard based on your bed size. Mark your measurements on the plywood or wood panel with a pencil. Use a saw to cut the board to size. Always wear safety goggles and gloves when cutting.
Step 2: Sand Edges Smooth
Smooth all rough edges using sandpaper or an electric sander. This helps prevent splinters and creates a professional finish.
Step 3: Add Padding (Optional)
If you want a cushioned headboard, cut foam padding to match your board size. Spray adhesive can help attach the foam securely. Let it dry as instructed by the manufacturer.
Step 4: Upholster Your Headboard
Drape fabric or upholstery material over the padded board, making sure there’s enough excess on all sides to wrap around the back. Pull the fabric taut and staple it to the back side of the board, starting from the center of each edge and working toward the corners for an even stretch.
Step 5: Secure Mounting Hardware
If you plan to mount the headboard to the wall, attach L-brackets evenly along the back using screws and a drill/driver. Alternatively, you can install a French cleat system for easy removal or adjustment.
Step 6: Install Your Headboard
With a helper, position your finished headboard at the desired height behind your bed. Use a level to ensure it’s perfectly straight before securing it to either the bed frame or directly into wall studs for maximum stability.
DIY Safety Tips for Americans
- Always work in a well-ventilated area.
- Wear proper safety gear—goggles, gloves, and dust mask if sanding.
- Keep tools out of reach of children and pets.
- If using power tools for the first time, review safety instructions or watch instructional videos specific to American models.
Your Custom Touch Matters!
This step-by-step process ensures that building your own headboard is approachable, safe, and rewarding. With just basic American household tools and some creativity, you can easily add a personal statement piece to your bedroom décor.
5. Installation and Finishing Touches
Once your custom headboard is built, it’s time to install it securely and add those all-important finishing touches that will make it uniquely yours. Start by deciding whether you want to mount your headboard directly to the wall, attach it to your bed frame, or let it stand alone. For wall mounting, use a stud finder to locate studs for maximum support. Mark the placement, then use heavy-duty screws or brackets rated for your headboard’s weight. If attaching to a bed frame, most frames have pre-drilled holes—just line them up and secure with bolts or hardware kits from your local home improvement store.
After installation, bring out the personality in your project with paint or wood stain. For a modern farmhouse look, consider a whitewash finish; for something bold, go with deep colors or even a two-tone effect. Make sure to sand lightly between coats for a smooth professional finish. Don’t forget details like decorative nails, upholstered panels, or unique hardware—these small additions can turn a simple headboard into a true statement piece. Whether you go rustic, classic, or contemporary, these final touches are what give your bedroom that personal flair that feels perfectly at home in any American space.
6. Caring for Your Custom Headboard
Once you’ve put in the effort to build a custom headboard, it’s important to keep it looking its best for years to come. Proper maintenance will not only enhance its appearance but also preserve its structure and value. Here are some practical tips for caring for your new headboard:
Regular Cleaning
Dust your headboard at least once a week using a soft, dry cloth or a microfiber duster. For upholstered headboards, use a vacuum with an upholstery attachment to remove dust and debris from fabric surfaces. Spot-clean stains as soon as they occur with a gentle cleaner that’s appropriate for the material—test any solution in a hidden area first.
Protect from Moisture
Avoid exposing your headboard to excessive moisture, which can damage wood finishes or promote mold growth on fabric and padding. If your bedroom is humid, consider using a dehumidifier. Always clean up spills immediately and allow the area to air dry thoroughly.
Guard Against Sunlight
Direct sunlight can cause fading or discoloration over time, especially on painted or fabric-covered headboards. Position your bed away from windows if possible, or use curtains and blinds to limit sun exposure during peak hours.
Tighten Hardware Periodically
If your custom headboard is attached with bolts, screws, or brackets, check them every few months and tighten as needed. This keeps your headboard secure and helps prevent wobbling or accidental damage.
Consider Protective Treatments
For wood headboards, applying furniture polish or wax can add shine and create a protective barrier against scratches and spills. For fabric options, consider using a fabric protector spray to resist stains and make cleaning easier.
By following these simple care tips, you’ll ensure your custom headboard stays beautiful and functional for many years—making your bedroom truly feel like home.