1. Understanding the Importance of Accent Lighting
Accent lighting plays a crucial role in highlighting artwork and enhancing its overall impact in a space. The right lighting not only draws attention to your art but also adds depth, texture, and warmth to the surrounding area. Without proper illumination, even the most stunning piece can go unnoticed or appear flat and lifeless.
How Accent Lighting Enhances Artwork
When used correctly, accent lighting can bring out the details, colors, and textures of your artwork. It creates a focal point in the room, guiding the viewer’s eye and making the piece stand out. Below are some key benefits of using accent lighting for your artwork:
| Benefit | Description |
|---|---|
| Enhances Visual Appeal | Proper lighting makes colors more vibrant and details more pronounced. |
| Adds Depth | Shadows and highlights create dimension, making artwork feel more dynamic. |
| Creates a Focal Point | Draws attention to specific pieces, allowing them to be the centerpiece of a room. |
| Improves Ambience | Soft, well-placed lighting enhances the mood and atmosphere of a space. |
The Role of Light Temperature and Intensity
The temperature and intensity of light can significantly impact how an artwork is perceived. Warmer tones (2700K-3000K) create a cozy feel, while cooler tones (4000K-5000K) highlight crisp details and vibrant colors. The intensity should be balanced—not too harsh to cause glare or too dim to obscure details.
Common Mistakes to Avoid
- Using Harsh Lighting: Direct, overly bright lights can cause glare and wash out colors.
- Poor Placement: Incorrect angles may create shadows or uneven illumination.
- Mismatched Light Temperature: Inconsistent color temperatures can distort the true appearance of the artwork.
- Lack of Adjustability: Fixed lighting may not accommodate different artworks or room setups over time.
Key Takeaway
Choosing the right accent lighting is essential for showcasing artwork effectively. By understanding how light impacts color, depth, and perception, you can create a visually appealing display that enhances both your artwork and your space.
2. Choosing the Right Type of Lighting
Choosing the right type of lighting is essential to enhance your artwork and create the perfect ambiance in your space. Different lighting options offer unique benefits, so its important to explore various types before making a decision.
Track Lighting
Track lighting is a versatile option that allows you to adjust the direction and position of the lights. This is ideal for illuminating multiple pieces of artwork or changing displays over time. With adjustable heads, you can focus light exactly where it’s needed.
Pros:
- Adjustable and flexible
- Can highlight multiple artworks
- Sleek and modern design
Cons:
- May require professional installation
- Can create unwanted shadows if not positioned correctly
Picture Lights
Picture lights are mounted directly above or on the frame of your artwork, providing focused illumination. These lights add a classic touch and work well for single pieces, making them a great choice for highlighting special artwork.
Pros:
- Directly highlights individual artwork
- Adds an elegant, museum-like feel
- Easy to install
Cons:
- Might not work well for large artworks
- Lamps may need frequent replacement depending on the bulb type
Recessed Lighting
If you prefer a clean and minimalistic look, recessed lighting is a great choice. These lights are installed into the ceiling and can be angled to direct light onto your artwork without any visible fixtures.
Pros:
- Sleek and unobtrusive design
- Avoids glare when properly positioned
- Suits modern interiors well
Cons:
- Permanently fixed; lacks flexibility
- Might require remodeling for installation
Comparison Table: Choosing the Best Lighting Option
| Lighting Type | Main Benefit | Main Drawback | Best For |
|---|---|---|---|
| Track Lighting | Flexible and adjustable positioning | Might cast unwanted shadows if misaligned | A gallery-style setting or changing displays |
| Picture Lights | Adds a classic, elegant touch to artwork | Lacks coverage for large pieces of art | A single, framed piece needing focus |
| Recessed Lighting | Sleek, hidden design with focused lighting | Permanently fixed; requires ceiling installation | A modern space with built-in lighting needs |
The best lighting choice depends on your specific needs, room layout, and the type of artwork youre showcasing. Whether you prefer the adjustability of track lighting, the elegance of picture lights, or the subtlety of recessed lighting, selecting the right option will ensure your artwork stands out beautifully.

3. Considering Light Temperature and Brightness
Choosing the right lighting for your artwork isn’t just about placement and fixture style—it’s also about selecting the appropriate light temperature and brightness. The way light interacts with colors, textures, and materials can significantly impact how your artwork is perceived and even how well it holds up over time.
Understanding Color Temperature
Color temperature is measured in Kelvins (K) and determines whether a light source emits a warm, neutral, or cool tone. The right color temperature can enhance the colors in your artwork without distorting them.
| Color Temperature (Kelvin) | Appearance | Best For |
|---|---|---|
| 2700K – 3000K | Warm white (yellowish hue) | Traditional paintings, wood tones, warm-colored artworks |
| 3500K – 4100K | Neutral white (balanced tone) | Acrylics, mixed media, modern paintings with vibrant colors |
| 5000K – 6500K | Cool white to daylight (bluish hue) | Black-and-white photography, detailed sketches, contemporary art |
The Importance of Brightness
The brightness of a light source is measured in lumens. Too much brightness can cause glare and wash out details, while insufficient lighting might make the artwork look dull.
Selecting the Right Brightness Level
- Avoid overly bright lights: Excessive brightness can create glare and make certain colors appear unnatural.
- Aim for soft, diffused lighting: This helps highlight textures without causing harsh shadows.
- Dimmable options: Adjustable lighting allows you to fine-tune brightness based on ambient conditions.
Avoiding Damage from Lighting
Certain types of light can cause fading or deterioration over time. LED lights are a great choice since they emit little to no UV rays and generate minimal heat compared to incandescent or halogen bulbs. Keeping your artwork safe while making it look stunning should always be a priority.
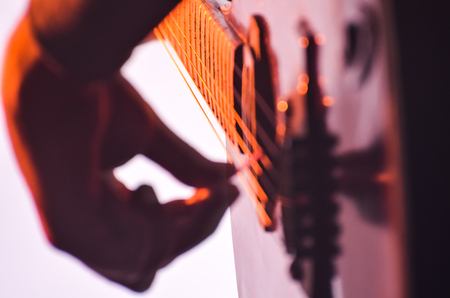
4. Positioning and Angling the Light Correctly
Proper positioning and angling of accent lighting are crucial to showcasing your artwork in the best possible way. Incorrect placement can cause glare, harsh shadows, or uneven illumination, which can diminish the visual appeal of your piece. Here’s how to do it right.
Avoiding Glare
Glare occurs when light reflects off the surface of your artwork, making it difficult to see details clearly. To minimize glare:
- Position the light source at a 30-degree angle from the artwork.
- If the artwork has a glass cover, adjust the angle slightly to prevent reflections.
- Use diffused lighting options like frosted bulbs or filters to soften direct light.
Finding the Right Angle
The angle of your accent lighting plays a key role in highlighting textures and colors without creating unwanted shadows. Use this guide to determine the best angle based on your artwork type:
| Artwork Type | Recommended Lighting Angle | Reason |
|---|---|---|
| Smooth or Glossy Artwork (e.g., framed prints) | 30-45 degrees | Avoids glare while maintaining even illumination. |
| Textured Artwork (e.g., oil paintings) | 15-25 degrees | Enhances texture by creating soft shadows. |
| Sculptures or 3D Art | Multiple angles | Adds depth and dimension by illuminating different sides. |
Considering Light Distance
The distance between your light source and artwork affects brightness and coverage. Follow these tips:
- If using track lighting or picture lights, position them about 12-24 inches away.
- Avoid placing lights too close, as this can create hotspots and uneven lighting.
- Dimmers can help you fine-tune brightness levels for optimal display.
Testing and Adjusting
No two artworks are the same, so take time to test different positions and angles before finalizing your setup. Stand at various viewing distances to check for glare or uneven lighting. Adjust as needed to achieve a balanced, natural look that enhances your art without overpowering it.
5. Avoiding Common Lighting Mistakes
When selecting accent lighting for your artwork, it’s important to avoid common mistakes that can negatively impact the way your pieces are displayed. Issues like harsh lighting, incorrect placement, or using the wrong type of bulbs can lead to glare, uneven illumination, or even damage to your artwork over time.
Using Harsh or Overly Bright Lighting
One of the most frequent mistakes is using lighting that is too bright or harsh. Intense light can create glare, making it difficult to appreciate the details of the artwork. Additionally, excessive brightness can cause fading or deterioration, especially for delicate materials like watercolor paintings or photographs.
How to Avoid This:
- Use soft LED lights with adjustable brightness.
- Avoid direct spotlights that create intense reflections.
- Opt for warm white or neutral tones (2700K–3000K) instead of overly cool lighting.
Incorrect Placement of Lights
Poor positioning of lights can result in shadows, uneven illumination, or distracting reflections. If a light source is placed at the wrong angle, it may create unwanted glare or fail to highlight the artwork effectively.
Best Placement Tips:
| Lighting Type | Ideal Placement |
|---|---|
| Picture Lights | Mounted above the frame, angled downward at 30 degrees. |
| Track Lighting | Aimed at a 30-degree angle from ceiling-mounted tracks. |
| Wall Washers | Placed evenly along the wall to provide uniform lighting. |
| Recessed Lights | Aimed at a slight angle to reduce glare and enhance visibility. |
Selecting the Wrong Type of Bulb
The type of bulb you use plays a crucial role in how your artwork is perceived. Certain bulbs emit too much heat or have poor color rendering, which can distort colors and even damage sensitive materials over time.
The Best Bulbs for Artwork:
- LED Bulbs: Energy-efficient, low-heat emission, and available in various color temperatures.
- Museum-Quality Halogen: Offers excellent color accuracy but should be used with UV filters to prevent fading.
- No Incandescent Bulbs: These produce too much heat and can cause gradual damage to artwork.
Avoiding UV and Heat Damage
Certain types of light can emit harmful ultraviolet (UV) rays and excess heat, which can gradually fade colors and weaken delicate materials. Protecting your artwork from these elements is essential for long-term preservation.
How to Prevent Damage:
- Select LED lights with no UV emissions and low heat output.
- If using halogen bulbs, install UV filters to minimize harmful rays.
- Avoid placing lights too close to artwork to prevent overheating.
Avoiding these common mistakes will help ensure that your artwork remains well-lit and protected while being displayed in its best possible form. By choosing the right lighting type, placement, and bulb selection, you can enhance your space while preserving the beauty of your collection.