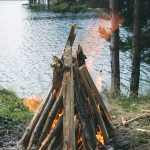
1. Gather Your Materials and Tools
Before you start building your DIY fire pit, its important to gather all the necessary materials and tools. Having everything ready will make the process smoother and more efficient.
Essential Materials
Here are the key materials youll need to build a sturdy and safe fire pit:
| Material | Description |
|---|---|
| Bricks or Pavers | Used to form the outer wall of the fire pit. |
| Gravel | Provides a solid base and helps with drainage. |
| Sand | A layer of sand can help level the base. |
| Masonry Adhesive (Optional) | Keeps bricks or pavers securely in place. |
| Metal Fire Ring (Optional) | Adds durability and extends the life of your fire pit. |
Essential Tools
You’ll also need some basic tools to help assemble your fire pit properly:
- Shovel: For digging and leveling the base area.
- Tape Measure: Ensures accurate measurements for placement.
- Level: Helps keep everything even and stable.
- Tamping Tool: Compacts the ground for a solid foundation.
- Masonry Hammer or Rubber Mallet: Useful for adjusting bricks or pavers into position.
- Safety Gear: Gloves and safety glasses for protection while working.
Once you have all your materials and tools ready, you’re all set to move on to the next step: preparing the ground for your fire pit!
2. Choose the Right Location
Selecting the perfect spot for your DIY fire pit is crucial for both safety and legality. Before you start digging, take some time to evaluate your outdoor space and ensure that the location meets all necessary requirements.
Check Local Regulations
Before building your fire pit, check with your local government or homeowners’ association to see if there are any restrictions or permits required. Some areas have strict fire codes, especially in regions prone to wildfires.
Maintain a Safe Distance
Your fire pit should be placed at a safe distance from structures, trees, and other flammable materials. A good rule of thumb is to keep it at least 10-20 feet away from buildings, fences, sheds, or overhanging branches.
Recommended Clearances
| Item | Minimum Distance |
|---|---|
| Houses & Structures | At least 10-20 feet |
| Trees & Branches | At least 10 feet overhead clearance |
| Fences & Sheds | At least 10 feet |
| Propane Tanks & Fuel Storage | At least 25 feet |
Avoid Windy Areas
Wind can make a fire difficult to control, increasing the risk of sparks spreading. Choose a location that is sheltered from strong winds but still has enough airflow to allow proper ventilation.
Select a Level Surface
Your fire pit should be built on level ground to prevent tipping or uneven burning. Avoid placing it on slopes or loose soil that could shift over time.
Use Non-Flammable Ground Materials
The area surrounding your fire pit should be made of non-flammable materials such as gravel, sand, bricks, or concrete. Avoid placing it directly on grass or wooden decks unless you have proper heat-resistant barriers.
Best Ground Materials for Fire Pit Areas
- Gravel: Affordable and effective at preventing fire spread.
- Pavers/Bricks: Provides stability and a finished look.
- Concrete Slab: Durable and fire-resistant.
- Sand: Helps absorb heat and provides a natural look.
Create a Safety Perimeter
A good practice is to create a safety zone around your fire pit using stones, bricks, or a metal ring. This helps contain the fire and prevents embers from escaping.
Avoid Placing Near Overhead Obstacles
If you have a covered patio or low-hanging power lines nearby, avoid placing your fire pit underneath them. Heat and smoke can cause damage or create hazards.
Selecting the right location ensures that your fire pit is both enjoyable and safe for everyone. Once youve chosen an appropriate spot, youre ready to move on to the next step: preparing the ground for installation.
3. Prepare the Fire Pit Base
Before you start stacking bricks or placing stones, its crucial to create a strong and level foundation for your fire pit. This will ensure stability and safety while preventing unwanted shifting over time. Follow these steps to prepare the base properly.
Mark the Fire Pit Area
Start by deciding where you want to place your fire pit. Choose a flat, open space that is at least 10-15 feet away from any structures, trees, or other flammable materials.
Steps to Mark the Area:
- Use a stake or pole in the center of your chosen spot.
- Tie a string to the stake and measure out the desired radius (typically 3-4 feet).
- Walk around in a circle with spray paint, marking the perimeter as you go.
- Double-check that the area is clear of roots, rocks, or other obstacles.
Dig the Foundation
Once your area is marked, its time to dig out the base. A proper foundation will help keep your fire pit stable and prevent sinking over time.
How Deep Should You Dig?
| Fire Pit Type | Recommended Depth |
|---|---|
| Above-Ground Fire Pit | 6 inches |
| In-Ground Fire Pit | 12 inches |
- Use a shovel to remove grass and topsoil within your marked circle.
- If youre building an above-ground fire pit, dig about 6 inches deep.
- If youre creating an in-ground fire pit, dig around 12 inches deep.
- Ensure that the bottom of the pit is as level as possible using a tamper or hand compactor.
Add Gravel or Sand for Stability
A layer of gravel or sand will improve drainage and provide a solid foundation for your fire pit walls. This step also helps prevent water from pooling at the bottom.
Choosing the Right Base Material:
| Material | Benefits |
|---|---|
| Gravel | Excellent drainage, prevents shifting |
| Paver Sand | Easier to level, provides firm support |
| Cement Base (optional) | Maximum stability, long-lasting |
- Add about 2-3 inches of gravel or sand to the bottom of your dug-out area.
- Use a rake to spread it evenly across the surface.
- Tamp it down firmly with a hand tamper or plate compactor to create a solid base.
- If needed, add another layer and repeat until you have a stable surface.
Your fire pit base is now ready! With a properly prepared foundation, your fire pit will be sturdy, safe, and long-lasting. In the next step, well move on to building the walls of your fire pit.
4. Build the Fire Pit Structure
Now that you have your base ready, its time to start building the actual fire pit structure. Follow these steps to lay bricks or pavers, secure them properly, and ensure a sturdy construction.
Step 1: Lay the First Layer of Bricks or Pavers
Begin by placing your first layer of bricks or pavers in a circle, following the outline you created earlier. Make sure they fit snugly together without large gaps.
Step 2: Check for Level and Adjust
Use a level to check if the first layer is even. If needed, adjust by adding or removing sand or gravel beneath the bricks until they are perfectly level.
Step 3: Apply Adhesive or Mortar (Optional)
If you want extra stability, apply a heat-resistant adhesive or mortar between the bricks before stacking additional layers. This will help hold everything in place.
Step 4: Stack Additional Layers
Add more layers of bricks or pavers, making sure to stagger the joints for better stability. Continue stacking until you reach your desired height.
Step 5: Secure the Top Layer
The final layer should be securely attached using adhesive or mortar to prevent shifting over time. Double-check alignment and stability.
Step 6: Ensure Proper Ventilation
Leave small gaps between some bricks on the bottom layer to allow airflow. Proper ventilation helps maintain a healthy fire and prevents smoke buildup.
Fire Pit Construction Overview
| Step | Description |
|---|---|
| Lay First Layer | Create a circular base with bricks or pavers. |
| Check for Level | Ensure the base is even and adjust as needed. |
| Add Adhesive/Mortar | (Optional) Use heat-resistant adhesive for stability. |
| Stack Layers | Add more rows while staggering joints for strength. |
| Secure Top Layer | Attach the top row firmly with adhesive or mortar. |
| Create Ventilation | Leave small gaps at the bottom for airflow. |
Troubleshooting Tips:
- If your bricks are shifting, check if the ground is level and adjust as necessary.
- If gaps are too wide, reposition bricks to create a tighter fit.
- If using mortar, allow it to dry completely before lighting a fire.
Your fire pit structure is now complete! In the next section, well go over how to add finishing touches and prepare your fire pit for use.
5. Finishing Touches and Safety Tips
Now that your DIY fire pit is built, its time to add the finishing touches and ensure its safe for use. Proper sealing, ventilation, and fire safety measures will help keep your fire pit in top shape for years to come.
Sealing Gaps for Stability
To make sure your fire pit is sturdy and durable, check for any gaps between the bricks or stones. Use heat-resistant mortar or fire-rated adhesive to seal these spaces. This will prevent shifting and improve the longevity of your fire pit.
Maintaining Proper Ventilation
A well-ventilated fire pit ensures efficient burning and prevents excessive smoke buildup. Here are some key ventilation tips:
- Leave small gaps between some of the bricks or stones at the base of the pit to allow airflow.
- If using a metal fire ring, ensure it has pre-drilled holes for ventilation.
- Avoid blocking airflow with large logs; stack wood in a way that allows air to circulate.
Fire Safety Best Practices
Safety is essential when using a fire pit. Follow these best practices to reduce risks:
| Safety Tip | Description |
|---|---|
| Choose a Safe Location | Keep your fire pit at least 10-15 feet away from buildings, trees, and flammable objects. |
| Use the Right Fuel | Burn only dry, seasoned wood or approved fire pit fuel; avoid treated wood or trash. |
| Keep Water Nearby | Always have a hose, bucket of water, or fire extinguisher close in case of emergencies. |
| Supervise at All Times | Never leave a lit fire unattended, especially around children and pets. |
| Extinguish Properly | Douse the fire completely with water and stir ashes until cool before leaving the area. |
Caring for Your Fire Pit
A well-maintained fire pit lasts longer and stays safe to use. Here’s how you can take care of yours:
- Sweep out ash regularly to maintain airflow.
- If your fire pit has a metal bowl, apply a rust-resistant coating periodically.
- Cover it when not in use to protect it from rain and debris.
- Avoid using accelerants like gasoline, which can damage materials and pose safety hazards.
Your Fire Pit Is Ready!
Your DIY fire pit is now complete! By sealing gaps, maintaining proper ventilation, and following safety precautions, youll enjoy countless cozy nights around the fire. Stay safe and happy fireside gatherings!